
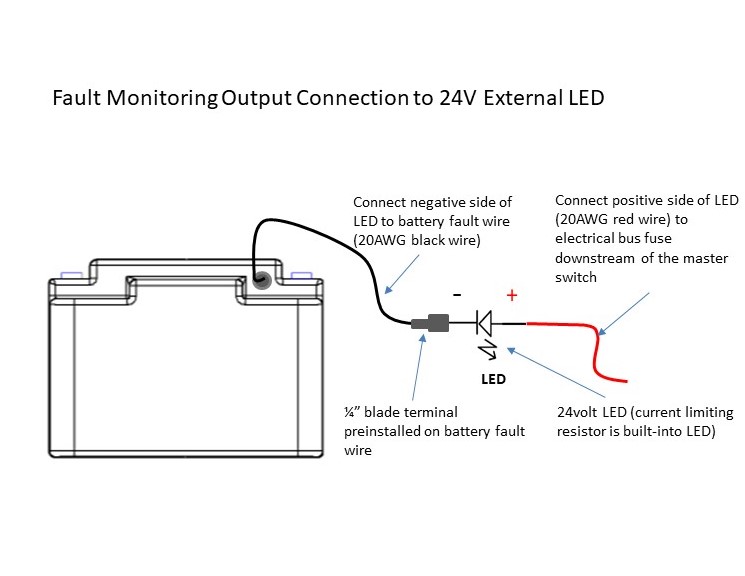
The 24V LED has a built in resistor for easy installation. It has compatibility with a 26.2-29.2V electrical system. To install, connect red wire to a positive bus connection. Then, connect the black wire to fault monitoring wire (also black) that is located on the EarthX battery.
The positive wire (red wire) of the LED should be connected to the electrical bus (24volt positive, typically to a fuse/breaker downstream of the master switch). Connect the negative of the LED (black wire) to the fault monitor wire (wire out the side of the battery) of the battery.
Steps:
1: install the 24V LED light thru a hole in your control panel.
2: cut the black wire to length desired for your installation so the LED’s black wire reaches the battery.
3: use a wire stripper to remove ¼” of the wire insulation so you can attach the “male” spade connector to the black wire. Crimp the male spade connector to black wire.
4: plug the male spade connector into the end of the pigtail wire from the battery.
5: connect the red wire to an electrical bus fuse/breaker (.25-3 AMP). You may have to untwist wire and cut to length. Most of the time, it is most convenient to connect to a fuse on the back side of the panel. If not, it could also be connected directly to the positive terminal of the battery with a ¼” ring lug connector.